
Introduction
Why Banana Bread Remains a Timeless Classic
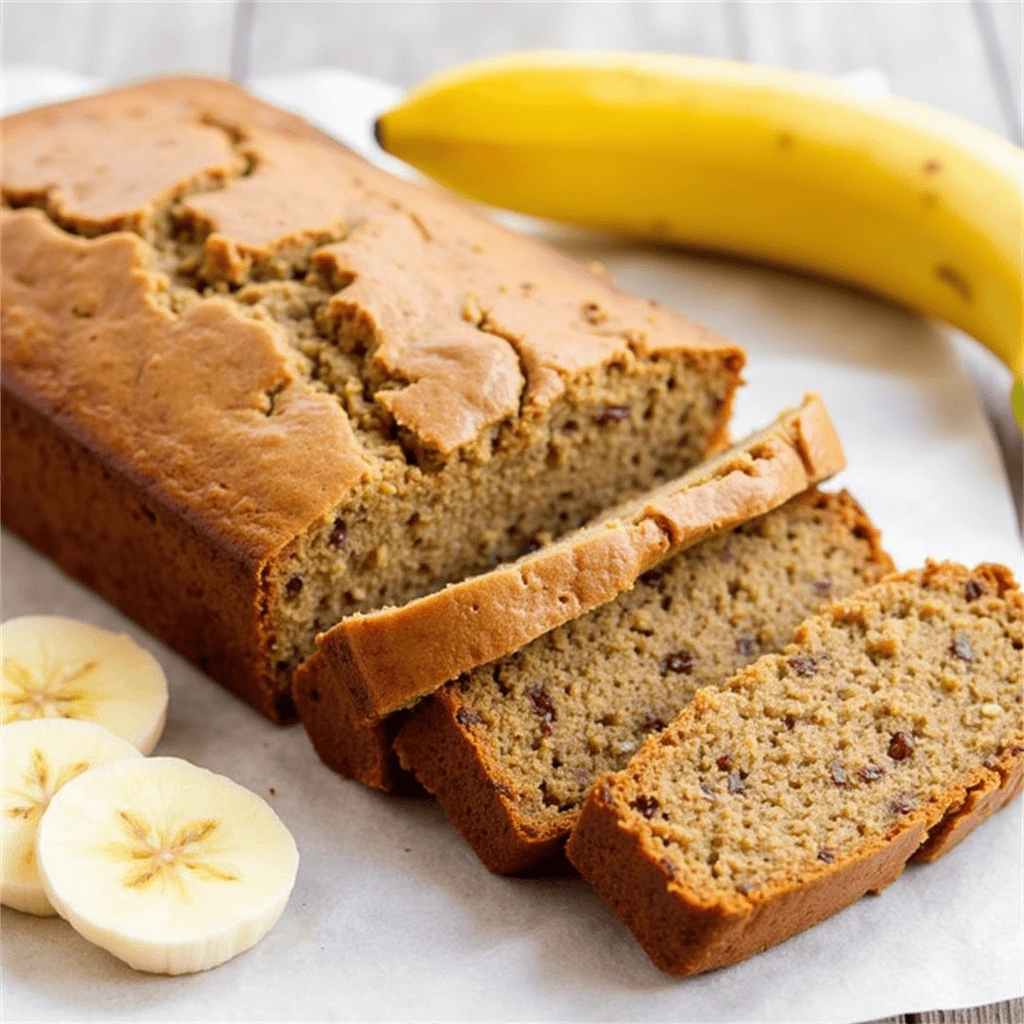
Banana bread has stood the test of time as one of the most beloved comfort foods across generations. From busy moms looking for quick baking wins to beginner bakers wanting a fail-proof first recipe, this humble loaf always delivers. And it’s easy to see why: banana bread is moist, sweet, satisfying, and incredibly simple to make. It turns everyday pantry staples—and often those spotty bananas sitting on the counter—into a mouthwatering treat everyone loves.
But not all banana breads are created equal. If you’ve ever ended up with a loaf that’s too dry, too dense, or lacking flavor, you’re not alone. The good news? With just a few easy tweaks and tips, you can master the perfect easy banana bread recipe—every single time.
In this blog post, I’ll walk you through a step-by-step guide to baking banana bread that’s:
- Wonderfully moist and soft
- Bursting with rich banana flavor
- Made with simple ingredients you already have
- Easy enough for anyone to pull off—no baking expertise required!
What You’ll Learn
I’m sharing five essential secrets that transform basic banana bread into bakery-worthy goodness. These aren’t gimmicks or complicated hacks—just straightforward tips that actually work. We’ll explore everything from choosing the ripest bananas to mastering the right baking time and flavor add-ins that elevate your loaf.
Whether you’re a first-time baker or a seasoned pro, this post will help you achieve consistent, delicious results. Plus, I’ll offer options for customizing your banana bread with dairy-free, nutty, or chocolatey twists.
So grab those overripe bananas and preheat your oven—it’s time to discover the best easy banana bread recipe ever.
Start With the Right Bananas

The foundation of any great banana bread begins with the bananas themselves. While it might be tempting to grab just any bananas from your fruit bowl, the ripeness and quantity of bananas you use can make or break your loaf’s texture and flavor.
The best banana bread is made with very ripe bananas—the ones with deep brown spots, or even a fully browned peel. These overripe bananas are naturally sweeter, softer, and more aromatic, which helps infuse your bread with that iconic rich banana flavor. But there’s a balance: while ripe bananas are essential, overly mushy or fermented ones can negatively affect the taste and texture.
In this section, we’ll break down:
- Why using ripe (but not rotten) bananas is crucial
- How to tell when your bananas are “bake-ready”
- The ideal number of bananas to use for a moist, fluffy loaf
Let’s dive into the banana basics to start your recipe off right.
Why Ripe Bananas Are Essential
When it comes to baking banana bread, not all bananas are created equal. Ripe bananas for baking are absolutely key to achieving that signature sweet, moist, and flavorful loaf. You want bananas that are heavily speckled or browned on the outside, soft to the touch, and almost mushy inside. These are bananas that many would consider past their prime for snacking—but they’re perfect for baking.
So why are ripe bananas for baking so important? As bananas ripen, their starches convert into sugars, which naturally sweeten your bread without the need for excessive added sugar. This transformation also enhances the banana’s aroma and flavor, giving your loaf that deep, authentic banana taste.
Beyond flavor, ripe bananas also add moisture and softness to the batter. This creates a tender crumb and prevents your banana bread from becoming dry or dense. The softer the banana, the easier it blends into your mix, ensuring an even texture throughout the loaf.
Tip: If your bananas aren’t quite ripe enough, you can speed up the process by placing them in a brown paper bag for a day or two, or bake them in the oven at 300°F (150°C) for 15–20 minutes until the skins blacken and the fruit softens.
In short, ripe bananas for baking aren’t just a suggestion—they’re the first and most important secret to the best easy banana bread.
How to Know Your Bananas Are Ready
Not every banana is suited for baking, especially when it comes to making the perfect banana bread. While fresh, yellow bananas are great for eating as a snack, the best results come from bananas that have reached just the right stage of ripeness. But how do you know when your bananas are truly ready for baking?
The ideal baking banana will have a peel that is heavily speckled with brown or even almost entirely black. The darker the peel, the riper the fruit. At this stage, the banana inside is soft, mushy, and ultra-sweet—perfect for blending smoothly into your batter. If the banana gives easily when you press it and has a strong, sweet smell, it’s a clear sign that it’s ready.
Here are a few quick tips to identify a banana that’s ready for baking:
- Color: Look for peels that are mostly brown or black with no trace of green.
- Texture: The banana should feel very soft and yield easily to gentle pressure.
- Smell: A rich, sweet aroma is a strong indicator that the banana has ripened fully.
- Skin Condition: Wrinkled or slightly collapsed skins are fine—as long as there’s no mold or fermented smell.
Remember: If you only have yellow bananas on hand, you can ripen them quickly by placing them in a paper bag with an apple, or bake them (in their skins) at 300°F (150°C) for about 15–20 minutes until the skins turn black.
Getting the ripeness right is essential—an underripe banana won’t blend well and will lack sweetness, while an overripe one might introduce too much liquid and a fermented taste.
Can You Use Frozen Bananas?
Yes, you absolutely can use frozen bananas to make banana bread—and many home bakers swear by it! In fact, freezing bananas is a great way to save those overripe ones for later baking. When thawed properly, frozen bananas offer the same sweetness, softness, and moisture that fresh overripe bananas do, making them a convenient and flavorful option.
Why Frozen Bananas Work So Well:
Freezing bananas breaks down their cell walls, which results in an even softer and more moist texture when thawed. This makes them ideal for blending smoothly into your banana bread batter. Additionally, because frozen bananas are typically frozen at peak ripeness, they retain their natural sweetness and aroma, which can even intensify slightly after freezing.
How to Use Frozen Bananas:
- Thaw Before Use: Let your bananas thaw at room temperature for about 30–60 minutes. If you’re short on time, you can microwave them in short bursts (20–30 seconds) until soft.
- Drain Excess Liquid: After thawing, you’ll notice they release a good amount of liquid. You can mash them with the liquid for extra moisture or drain a little if you prefer a firmer loaf.
- Mash Well: Frozen bananas are very easy to mash once thawed, so give them a good stir with a fork or potato masher before adding them to your batter.
A Few Tips:
- Freeze bananas with the peel on for simplicity, or peel and slice them before freezing for quicker use later.
- If your frozen bananas have a strange smell or discoloration (not just browning), discard them—they may have gone bad.
Pro Tip: Store overripe bananas in a zip-lock bag in the freezer so you always have some ready when the banana bread craving hits!
Use Simple Pantry Ingredients
One of the best things about banana bread is that it doesn’t require fancy ingredients or special trips to the store. In fact, you probably already have everything you need sitting in your pantry or fridge. Using common ingredients makes this recipe not only easy and affordable but also quick to throw together whenever the mood strikes.
These everyday staples—like flour, sugar, eggs, and baking soda—each play a crucial role in creating the moist texture, golden crust, and rich banana flavor we all love. When combined in the right balance, they turn humble bananas into a loaf that’s both comforting and delicious.
In this section, we’ll explore how choosing the right kind of flour, fat, and sugar can elevate your banana bread from good to absolutely irresistible.
All-Purpose Flour and Baking Soda
When it comes to banana bread, all-purpose flour is the gold standard. It strikes the perfect balance between structure and softness, ensuring your loaf holds its shape while staying moist and tender inside. Unlike cake flour (which can be too soft) or bread flour (which can be too dense), all-purpose flour gives banana bread the ideal crumb texture—light, but not crumbly.
But flour can’t do it all alone. That’s where baking soda comes in. This humble pantry staple is a powerful leavening agent that reacts with the natural acidity in ripe bananas (and sometimes yogurt or buttermilk, if used). The result? Airy pockets that form inside the batter, causing your banana bread to rise and become beautifully fluffy as it bakes.
To get the best results:
- Use 1 teaspoon of baking soda per 1 to 1.5 cups of flour.
- Make sure your baking soda is fresh—expired leavening can lead to a dense or flat loaf.
- Mix your dry ingredients (including baking soda) thoroughly before adding them to your wet mix, so everything is evenly distributed.
With the right amount of flour to give structure and baking soda to provide lift, you’re setting the foundation for a perfectly moist and well-risen banana bread.
Butter vs. Oil : Which is Better?
When it comes to making moist banana bread, the choice of fat plays a crucial role in both flavor and texture. Both butter and oil can be used, but each brings its own unique qualities to the finished loaf. Let’s compare these two fat options and explore how they affect your banana bread.
Butter:
- Flavor: Butter gives banana bread a rich, creamy flavor with a slight buttery taste that adds depth to the sweetness of the bananas. It also provides a tender crumb, but it can slightly firm up as the bread cools, especially if the butter is melted beforehand.
- Texture: While butter helps create a softer texture, it doesn’t contribute as much moisture as oil does. If you’re looking for a slight crispness around the edges and a tender middle, butter is an excellent choice.
- Best for: Those who prefer a classic flavor and don’t mind a slightly firmer texture.
Oil:
- Flavor: Oil, on the other hand, is more neutral in flavor, allowing the banana’s natural sweetness to shine through. It doesn’t interfere with the other flavors in the bread, making it a great option if you plan to add flavor-enhancing spices or mix-ins.
- Texture: Oil is fantastic for making moist banana bread. Since it remains liquid at room temperature, it helps retain the moisture in the bread long after baking. This results in a moist, soft loaf with a slightly denser texture compared to butter-based breads.
- Best for: Those who want a super moist loaf that stays fresh for days.
Which to Choose?
- For a moist banana bread that stays soft and fresh, oil is generally the better choice.
- If you’re after a richer flavor and don’t mind sacrificing a bit of moisture, butter works beautifully.
Can You Combine Both?
Absolutely! Many bakers opt to use a mix of both butter and oil to get the best of both worlds: the rich flavor of butter and the moisture from oil. A common ratio is half butter and half oil, but feel free to experiment based on your personal preferences.
Choosing the Right Sugar
When it comes to making banana bread, one of the key ingredients that can elevate its flavor and texture is sugar. The choice of sugar can influence everything from the sweetness of the bread to its moisture and texture. There are two popular options: brown sugar and white sugar. Each has its own set of benefits and can give your banana bread a unique twist. Let’s take a closer look at both and explore their impact on your banana bread.
Brown Sugar : Adds Richness and Moisture
- Flavor Profile:
Brown sugar, with its combination of white sugar and molasses, contributes a deep, warm, and slightly caramel-like flavor. This richness brings a unique complexity to your banana bread. It enhances the natural sweetness of the bananas and adds a subtle butterscotch or toffee flavor. This makes brown sugar perfect for those who prefer a deeper, more nuanced taste in their banana bread. - Moisture:
The molasses in brown sugar helps retain moisture, which keeps your banana bread soft and tender longer. It also adds a slight chewiness to the texture. If you want your banana bread to stay moist for several days, brown sugar is an excellent choice. - Texture:
Brown sugar can make your banana bread a bit denser, giving it a thicker, heartier texture. This is ideal if you enjoy a more substantial loaf. However, because of its moisture retention properties, it also helps in avoiding the dreaded dry banana bread.
White Sugar : Keeps It Classic and Light
- Flavor Profile:
White sugar, or granulated sugar, offers a cleaner, more straightforward sweetness. Unlike brown sugar, it doesn’t bring any additional flavors to the mix, letting the bananas and any spices like cinnamon or nutmeg stand out. If you’re aiming for a more traditional and classic banana bread flavor, white sugar is your go-to. - Moisture:
While white sugar doesn’t add moisture like brown sugar does, it still helps in creating a tender crumb. When mixed with fats like butter or oil, it allows the bread to have a soft, airy texture. However, it’s important to note that banana bread made with white sugar may dry out faster than those made with brown sugar. - Texture:
Banana bread made with white sugar tends to be lighter and fluffier in texture. If you prefer a loaf with a softer crumb, white sugar is the ideal option. It gives your banana bread that airy and light texture, which is especially loved by those who enjoy a less dense bread.
Can You Combine Brown Sugar and White Sugar?
Absolutely! Many bakers choose to mix brown sugar and white sugar to achieve the best of both worlds. By combining both sugars, you can get the rich depth and moisture from the brown sugar, while benefiting from the lightness and sweetness that white sugar brings. This combination creates a balanced sweetness that will satisfy every taste bud.
Which Sugar Should You Choose?
- For a Richer, Moist Loaf:
If you’re after a denser, more flavorful loaf, brown sugar is your best bet. It not only adds a richer taste but also ensures your banana bread stays moist and soft for longer. - For a Lighter, More Traditional Loaf:
If you prefer a more classic, light-textured banana bread, then white sugar is the way to go. It offers a clean, straightforward sweetness that lets the bananas shine. - For the Best of Both Worlds:
If you can’t decide between brown sugar and white sugar, consider mixing the two. This will give you the perfect balance of flavor, sweetness, and texture, resulting in a banana bread that’s both rich and light.
Master the Mixing for Perfect Texture
When it comes to banana bread, mixing the ingredients properly is essential for achieving the perfect texture. Whether you’re aiming for a moist and soft loaf or a slightly denser one, the technique you use can have a big impact. Too much mixing can result in a tough texture, while too little can lead to uneven batter. This section will cover how to master the mixing process to ensure your banana bread comes out with the ideal balance of lightness, moisture, and flavor. Keep reading to learn the best tips for mixing your ingredients just right.
The One-Bowl Method
(Keyword: one bowl banana bread)
→ Simplify cleanup without sacrificing quality.
The one-bowl method is the ultimate game-changer for those who want to make delicious banana bread with minimal hassle. By mixing everything in a single bowl, you cut down on both prep time and cleanup, making the baking process smoother and more enjoyable. The best part? You don’t have to worry about compromising on flavor or texture – your banana bread will still turn out just as moist and flavorful.
Why It Works
This method works because it allows you to combine all your ingredients in one bowl without needing to use multiple mixing bowls for dry and wet ingredients. The key is to add the ingredients in the correct order and mix them together in a way that doesn’t cause overmixing.
Start by combining your mashed ripe bananas with the wet ingredients (like butter, eggs, and sugar), then add the dry ingredients (flour, baking soda, and any spices) directly into the same bowl. Stir gently and incorporate until the flour is just mixed in—remember, no need to overwork it!
Tips for the Perfect One-Bowl Banana Bread
- Use a large mixing bowl: Since you’ll be combining all the ingredients in one place, a spacious bowl is essential to prevent spills and make sure everything gets incorporated evenly.
- Sift dry ingredients directly into the bowl: To ensure there are no lumps, sift the dry ingredients (like flour, baking soda, and spices) directly into your mixing bowl. This step adds air and helps the dry ingredients combine more easily with the wet ingredients.
- Be gentle with mixing: As always, don’t overmix. Stir just enough to bring everything together and create a thick batter—this will help keep the bread light and airy. The one-bowl method should be quick and easy, so no need to mix vigorously.
Cleanup Made Easy
The simplicity of the one-bowl method doesn’t just make the baking process faster; it also means less cleanup afterward. After pouring your banana bread batter into the pan, you’re left with just one bowl and a spoon or spatula to clean up—saving time and energy. You’ll be able to enjoy a warm slice of banana bread in no time, with minimal mess!
The one-bowl banana bread method is perfect for beginner bakers or anyone who loves simplicity without sacrificing flavor or quality. It’s a quick, easy way to make delicious banana bread with a perfect texture every time.
Don’t Overmix!
(LSI: banana bread tips)
→ Gently combine ingredients to avoid dense results.
When it comes to making banana bread, one of the most important tips to keep in mind is to avoid overmixing the batter. Overmixing is a common mistake that can lead to dense, heavy banana bread that doesn’t have the light, fluffy texture we all crave.
Why Overmixing Hurts Banana Bread
Overmixing the banana bread batter can activate the gluten in the flour too much, leading to a denser texture. Gluten is a protein found in flour, and when it gets overworked, it becomes tough, which is great for bread like bagels, but not ideal for banana bread. Banana bread, like cakes and muffins, benefits from a light touch in order to stay tender and moist.
When you mix the ingredients too vigorously or for too long, you end up with a dense, rubbery loaf. This is something to avoid, especially since one of the main appeals of banana bread is its soft, moist, and airy texture.
How to Avoid Overmixing
- Mix only until combined: The golden rule when mixing banana bread batter is to stop as soon as all the dry ingredients are just incorporated into the wet ingredients. You should still see a few streaks of flour—this is fine! You don’t need a perfectly smooth batter. Once the dry ingredients are folded in, you’re done.
- Use a gentle hand: Stir the batter slowly and gently. Use a spatula or wooden spoon and avoid using a hand mixer or stand mixer. The key is to fold the ingredients together, not beat them.
- Don’t worry about lumps: It’s completely normal to have a few small lumps in your batter. These lumps are perfectly fine, and they won’t affect the outcome of your banana bread. The main thing is to make sure the flour is mixed in without dry pockets.
- Resist the urge to keep stirring: After mixing, if the batter still feels a little lumpy, don’t try to smooth it out. The baking process will take care of it, and you’ll end up with a beautifully moist loaf without the risk of overmixing.
Why It’s Important for Texture
The reason overmixing is such a crucial issue in banana bread is that it directly affects the texture of the final product. When you gently combine the ingredients and avoid overmixing, you allow the batter to bake into a soft, moist, and tender loaf with just the right rise. Overmixing, on the other hand, can make the bread turn out dense and flat, even if the flavor is still good.
Banana Bread Tips for Perfect Texture
- Use the right flour: Ensure you’re using all-purpose flour, as it creates the ideal texture for banana bread. Avoid using too much flour or packing it into your measuring cup, as this can make the bread too dry.
- Incorporate ingredients slowly: Instead of dumping all your ingredients into the bowl at once, gradually add the dry ingredients to the wet ingredients. This ensures they mix evenly without too much stirring.
- Give the batter a rest: If you’re really concerned about overmixing, give the batter a short rest after mixing. This can help the flour hydrate properly and give you a more tender loaf.
By following these simple tips, you’ll avoid the dreaded dense banana bread and achieve a light, soft loaf every time.
Add the Eggs Last
(Entity: eggs)
→ Helps bind ingredients and adds moisture.
When making banana bread, the order in which you add ingredients plays a significant role in the final result. One key step that can elevate your banana bread to the next level is adding the eggs last. Here’s why this seemingly small detail makes such a big difference in the texture and consistency of your banana bread.
Why Add the Eggs Last?
Eggs play a crucial role in banana bread. They help to bind the ingredients together and provide structure, making the loaf hold its shape while remaining moist. However, adding eggs at the right time in the mixing process is important to ensure they perform these functions properly.
When you mix the wet ingredients (such as mashed bananas, butter or oil, and sugar), they should be blended together first. By adding the eggs last, after most of the wet ingredients are combined, you ensure that the eggs don’t get overworked or break down prematurely. This also prevents the eggs from turning the batter into an overly dense mixture before the leavening agents (like baking soda) have a chance to activate.
How Eggs Help the Banana Bread
Eggs contribute in multiple ways to the final loaf:
- Binding Agent: Eggs help to bind all the ingredients together, ensuring that the flour, bananas, sugar, and fats come together into a cohesive batter. This binding property is key for achieving a smooth, even texture and a well-structured loaf.
- Moisture: Eggs are rich in moisture, which helps to keep your banana bread soft and tender. This moisture prevents your bread from becoming dry and crumbly, making sure it has that irresistible, moist texture everyone loves.
- Structure: Eggs provide structure by contributing to the bread’s structure. The proteins in eggs set during baking, giving the loaf a sturdy, yet tender, texture. This is particularly important in banana bread, which needs to hold together without being too heavy.
- Leavening: Eggs also have a leavening effect when whipped or beaten slightly. The air pockets created help the bread rise, contributing to a light texture. Adding the eggs last ensures that this action works efficiently without interfering with the earlier steps of mixing.
The Best Way to Add Eggs
- Room Temperature: Ideally, eggs should be at room temperature when added to the batter. Cold eggs can cause the fat (such as butter or oil) to seize up, which could lead to an uneven mixture. To quickly warm up eggs, place them in a bowl of warm water for a few minutes.
- Crack and Beat Separately: It’s a good idea to crack the eggs into a separate bowl and beat them lightly before adding them to the rest of the ingredients. This ensures that the eggs are evenly distributed throughout the batter and that you won’t end up with egg streaks in your loaf.
- Gentle Mixing: Once added, mix the eggs gently into the batter, just until they are combined. Overmixing at this stage can cause the batter to become too dense, so it’s important to fold the eggs in carefully.
How Adding Eggs Last Affects the Texture
By adding the eggs last, you allow the dry ingredients (such as flour) to be gently incorporated without being overworked by the eggs. This results in a light, fluffy, and moist banana bread. Adding eggs too early or mixing too vigorously before adding them can create a denser loaf, which might lack the desired tenderness.
Overall, adding eggs last is a simple trick that ensures your banana bread achieves the perfect balance of structure, moisture, and rise. It’s a small but mighty step in the process that can make all the difference in the outcome.
By carefully considering when and how to add your eggs, you’ll ensure a banana bread that’s both delicious and beautifully textured every time.
Bake at the Right Temperature
Baking banana bread at the right temperature is key to getting that perfect loaf—golden on the outside and soft and moist on the inside. Setting the oven to the correct temperature ensures your banana bread rises evenly and cooks through without drying out. In this section, we’ll discuss the ideal baking temperature, why it matters, and tips for getting it just right.
Always Preheat Your Oven
Preheating your oven to 350°F (175°C) is essential for achieving the perfect banana bread. When you place your batter in a preheated oven, it ensures that the bread starts baking immediately and rises at the right pace, creating a light, fluffy texture. If you skip this step and place your dough in a cold oven, the bread may bake unevenly, leading to a denser texture and longer baking time.
Preheating also helps in setting the structure of the loaf. If the oven is cold, the bread may not form properly, causing cracks or uneven texture. For the best results, make sure to preheat the oven for at least 10–15 minutes before baking. This allows the heat to distribute evenly, ensuring that your banana bread bakes perfectly throughout.
Pro tip: Avoid opening the oven door during the first 20 minutes of baking. This can cause temperature fluctuations and may result in your loaf deflating or baking unevenly.
Check with a Toothpick
The toothpick test is one of the easiest and most reliable ways to check if your banana bread is perfectly baked inside. When you think your banana bread is nearing its end time, gently insert a toothpick or a skewer into the center of the loaf. If it comes out clean or with just a few crumbs attached, your banana bread is done. If it comes out with wet batter, it needs more time in the oven.
Why the Toothpick Test Works:
The idea behind the toothpick test is simple: when banana bread is fully cooked, the heat has set the structure of the loaf, and any wet batter will have fully solidified. The toothpick gives you a quick and non-invasive way to confirm doneness without disturbing the texture of the bread. If you use a toothpick or skewer with a smooth, long handle, it’ll also reach deeper areas of the loaf, ensuring that you check the right spot.
What to Look For:
- Clean toothpick: The loaf is fully baked with a soft and moist crumb.
- Crumbs on the toothpick: The bread may be a little underbaked, but it’s still safe to remove. The center is still moist but not wet.
- Wet batter: The bread requires more time. You might want to cover the loaf with foil to avoid overbaking the top while the inside continues to cook.
Pro tip: You can also check the top of the bread. If it’s a golden brown color and has a firm texture when gently pressed, it’s another good sign that it’s baked properly.
Using the toothpick test will help you avoid undercooked or overbaked banana bread, giving you the perfect balance of moisture and texture.
Don’t Overbake
One of the key factors in achieving a moist and delicious banana bread is ensuring that it is not overbaked. Overbaking can dry out the bread, making it dense and crumbly, which defeats the purpose of a tender and moist loaf. The ideal baking time varies depending on the oven and the specific recipe, but there are several key points to keep in mind:
1. Understand Your Oven:
- Every oven is different. Some ovens may run hotter than others, so it’s essential to keep an eye on your banana bread, especially during the last 10 minutes of baking. If you have an oven thermometer, use it to check the accuracy of the temperature, as even slight fluctuations can affect the outcome.
2. Ideal Baking Time:
- Typically, banana bread is baked at around 325°F to 350°F (165°C to 175°C) for 60 to 75 minutes. However, the best way to check if your banana bread is done is not solely based on time but also on visual and sensory cues.
- The bread should have a golden brown crust and appear slightly risen. The top should spring back when lightly pressed.
3. Use a Toothpick or Cake Tester:
- The most reliable way to determine doneness is by inserting a toothpick or cake tester into the center of the loaf. If it comes out clean or with just a few moist crumbs, your banana bread is done. If there is wet batter on the tester, give it a few more minutes and check again.
4. Watch for Overbaking Signs:
- If the edges of the bread are starting to darken excessively or if a toothpick comes out completely dry, there’s a chance your bread is overbaked. The internal moisture might have evaporated too much, leaving you with a loaf that lacks the soft, moist texture.
5. Use a Smaller Loaf Pan for More Even Baking:
- A larger pan can result in a flatter loaf, which may bake too quickly on the outside and not fully cook on the inside. For a more evenly baked loaf with a moist interior, consider using a slightly smaller loaf pan. If you’re using a 9×5-inch pan and notice the loaf is baking too fast, you can switch to an 8×4-inch pan for better results.
6. Resist the Urge to Open the Oven Too Often:
- It’s tempting to check the bread every few minutes, but opening the oven door lets heat escape, which can cause uneven baking. Instead, set a timer for the lower end of the suggested baking time and check the loaf only after it goes off. This reduces the risk of overbaking.
7. Cool It Down Properly:
- After you remove the banana bread from the oven, let it cool in the pan for 10 to 15 minutes. Then, transfer it to a wire rack to cool completely. This cooling period helps the moisture redistribute within the loaf, which contributes to the final texture.
By following these tips, you can ensure that your banana bread retains a moist and tender crumb without drying out from overbaking. The key is to find the sweet spot where the loaf is fully cooked but still soft and enjoyable to eat.
Boost Flavor with Add-ins
Banana bread is a classic treat that allows for endless customization. Adding different mix-ins can elevate your banana bread to a whole new level. Whether you’re looking to add texture, a touch of sweetness, or a deeper flavor profile, these add-ins can help you achieve the perfect loaf. Let’s explore some of the best ways to boost flavor with nuts, chocolate, spices, and dietary adaptations.
Nuts or Chocolate Chips
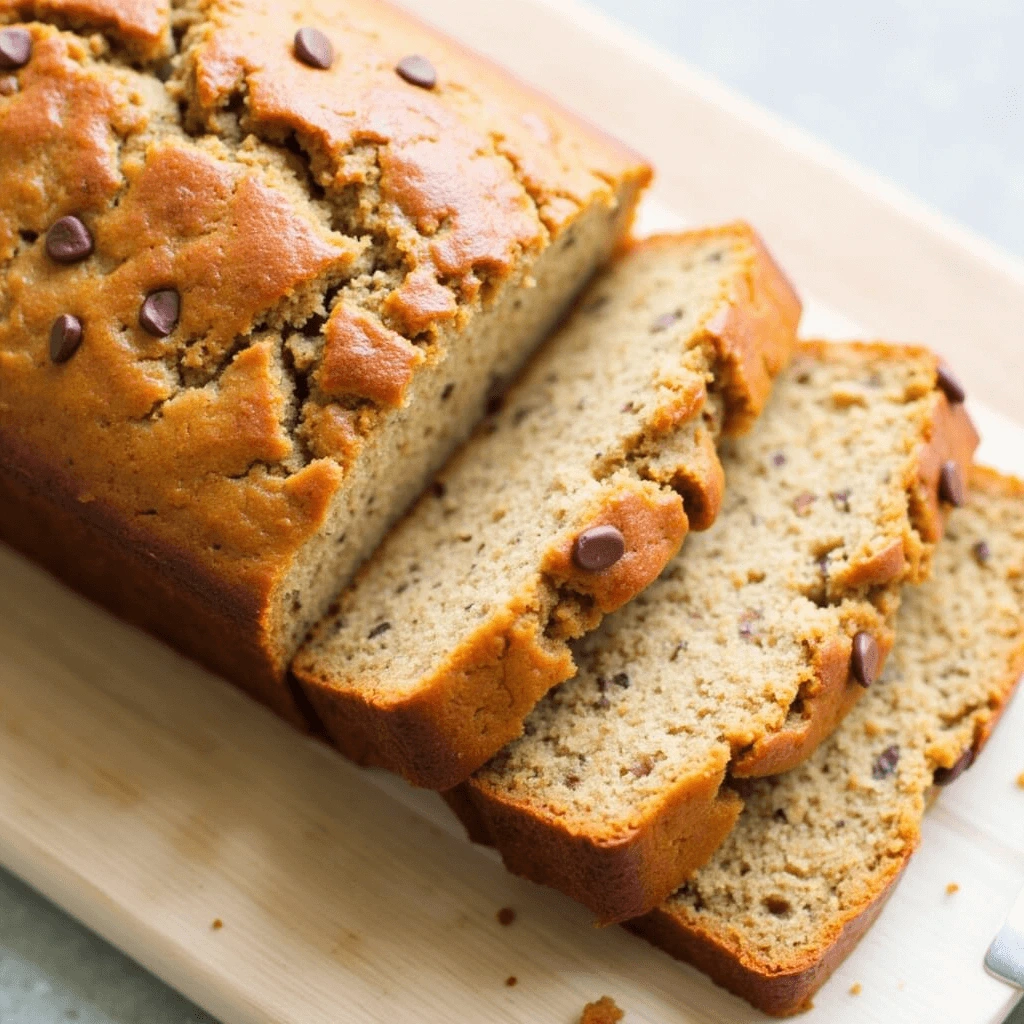
Adding nuts or chocolate chips to your banana bread not only boosts the flavor but also enhances the texture. A classic option is banana bread with walnuts, which adds a delightful crunch and complements the sweetness of the bananas. Walnuts offer a slightly earthy flavor that pairs perfectly with ripe bananas, giving the loaf a satisfying texture.
If you prefer something sweeter, chocolate chips are an indulgent addition. Whether you go for dark, milk, or white chocolate chips, the melting chocolate creates pockets of sweetness that enhance every bite. Mixing both nuts and chocolate chips can create a perfect balance between crunchy and gooey textures.
Other nut options include pecans, almonds, and hazelnuts. Each nut brings its own unique flavor and texture, from buttery pecans to the subtly sweet taste of hazelnuts.
Warm Spices Like Cinnamon and Nutmeg
To add depth to your banana bread, consider incorporating warm spices like cinnamon and nutmeg. These spices enhance the natural sweetness of bananas and create a comforting, aromatic loaf. Cinnamon is a classic spice for banana bread, bringing warmth and a hint of spice to every slice.
Nutmeg adds a nutty, slightly sweet flavor that complements cinnamon perfectly. Together, these two spices create a cozy aroma that fills the kitchen while baking. You can also experiment with other spices, such as cloves or ginger, for a bit of extra warmth or spice.
Make It Dairy-Free or Gluten-Free
Banana bread is highly adaptable for those with dietary restrictions. Making it dairy-free is simple—swap out butter for plant-based oils like coconut oil, olive oil, or avocado oil, and substitute non-dairy milk (like almond milk or oat milk) for regular milk. These swaps will keep your banana bread moist and delicious without sacrificing flavor.
For a gluten-free version, you can use gluten-free flour blends or almond flour. Gluten-free flour blends are specially designed to mimic the texture of regular flour, while almond flour adds a slight nuttiness to the bread. You may also need to include a binding agent like xanthan gum to ensure the bread holds together.
These substitutions allow you to enjoy banana bread without compromising on taste or texture, making it suitable for various dietary needs.
Conclusion
Banana bread is an incredibly versatile recipe that can be customized to suit your taste. By adding nuts, chocolate chips, and spices, you can enhance its flavor and texture. Plus, making simple dairy-free or gluten-free swaps allows you to cater to dietary preferences without sacrificing flavor.
Here’s a quick recap of the 5 secrets to mastering banana bread:
- Use ripe bananas for maximum sweetness.
- Avoid overbaking to maintain a moist texture.
- Boost flavor with add-ins like nuts, chocolate chips, and spices.
- Make it dairy-free or gluten-free with easy substitutions.
- Experiment with different flavor combinations.
Now it’s your turn to try these tips and create your perfect loaf of banana bread. Don’t forget to share your results with us—we can’t wait to hear how it turns out!